Setting Up And Managing Form Portals
MakeForms introduces the concept of “Form Portals”. These portals consolidate your forms in a singular location. Especially handy for those managing hundreds of forms, it simplifies the user experience by providing a singular link where users can search among various forms and complete them.
Table of Contents
Creating Form Portal
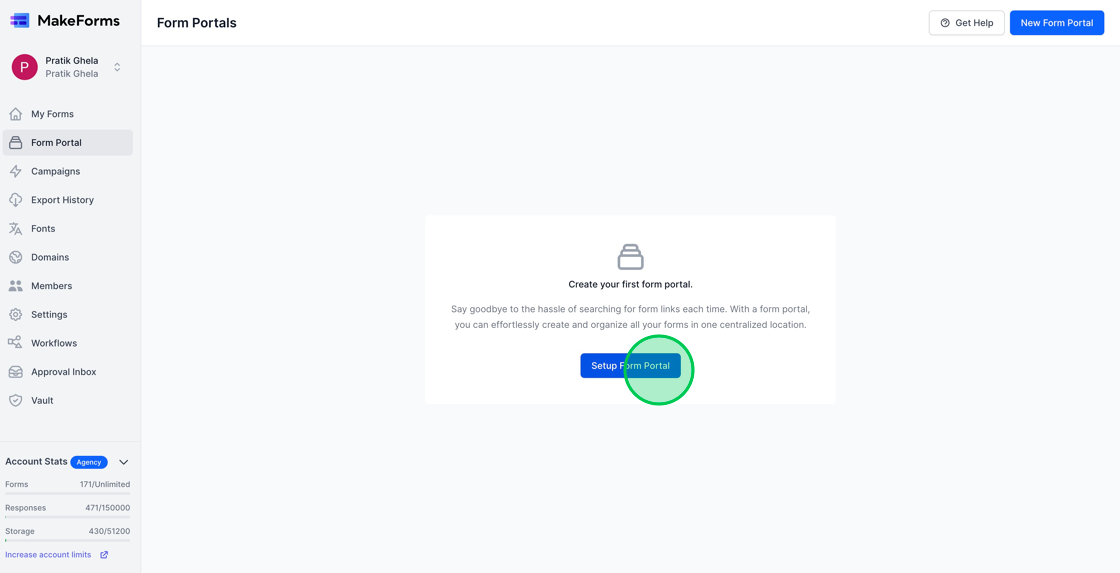
1. To set up your initial form, select the “Form Portal” link located on the left-hand menu.

2. If you’re establishing your first portal, click on the blue “Setup Form Portal” button. However, if you already have Form Portals, select the “New Portal” button located on the top right.
3. When you’re on the ‘create form portal’ page, input the desired name into the “Portal Name” field.

4. The Form Portal feature allows you to customize it with a featured image, your company logo, favicon, and buttons. You can personalize these sections by uploading the respective images for each.

5. After configuring your logo, header image, and buttons, proceed to choose the published forms you wish to display on your Form Portal. Make your selections in the “Form Selection” area.

6. To showcase forms from a specific folder on the Form Portal, simply click on that folder and begin choosing the desired forms.

Publishing Form Portal
1. After you’ve chosen the desired forms, the next action is to publish the Form Portal. By default, form portals are hosted on frms.link. However, for those with a Pro plan or higher, there’s an option to publish the form on a custom domain. When using frms.link, a portal link is automatically created for you. But with a custom domain, you get to decide the specific URL.
2. For our purposes, we’ll opt to publish on our custom domain. To designate your domain, simply click the dropdown menu labeled “Domain”. Afterward, input your preferred URL and then press the “Save” button.

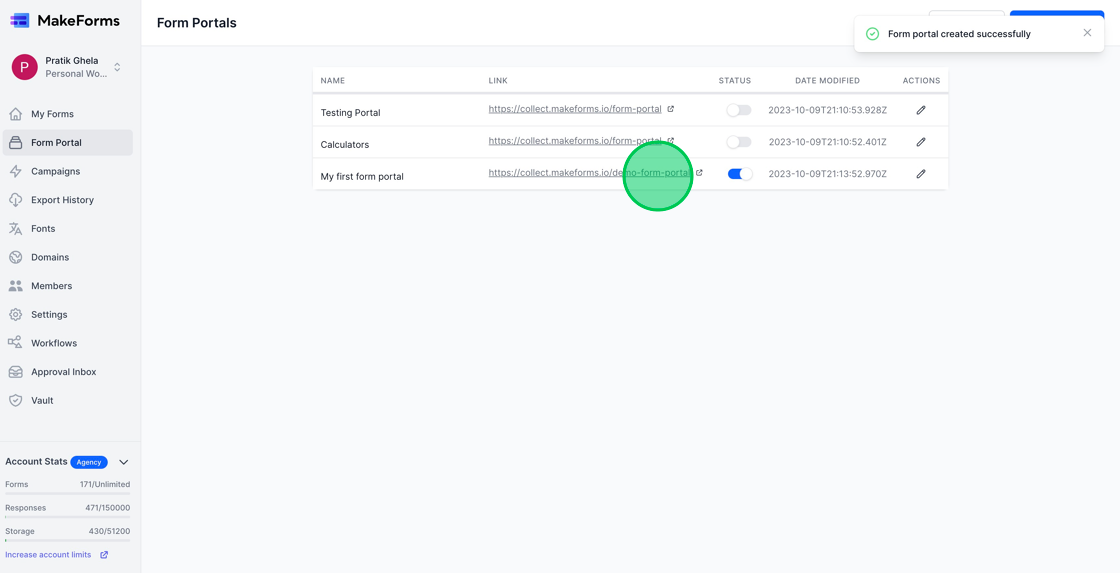
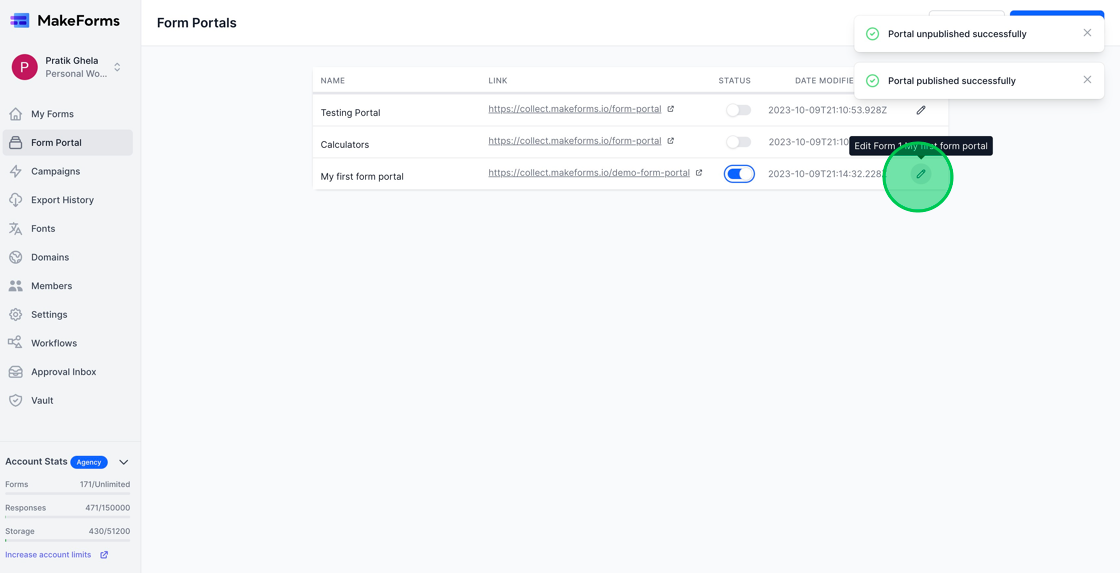
3. After publishing your Form Portal, you’ll be automatically taken to the “Form Portals” page, where all your active Form Portals are displayed. From here, click on the link to view the Form Portal you’ve recently set up.
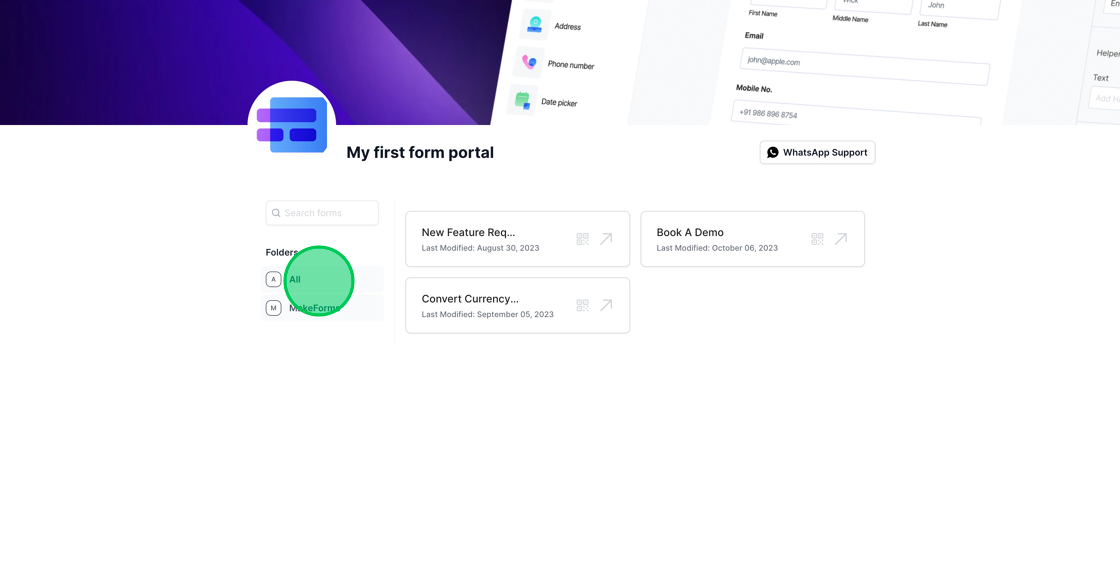
4. Upon viewing the form portal, you’ll observe its layout. The header image, logo, and button are all presented according to the configurations you set earlier.
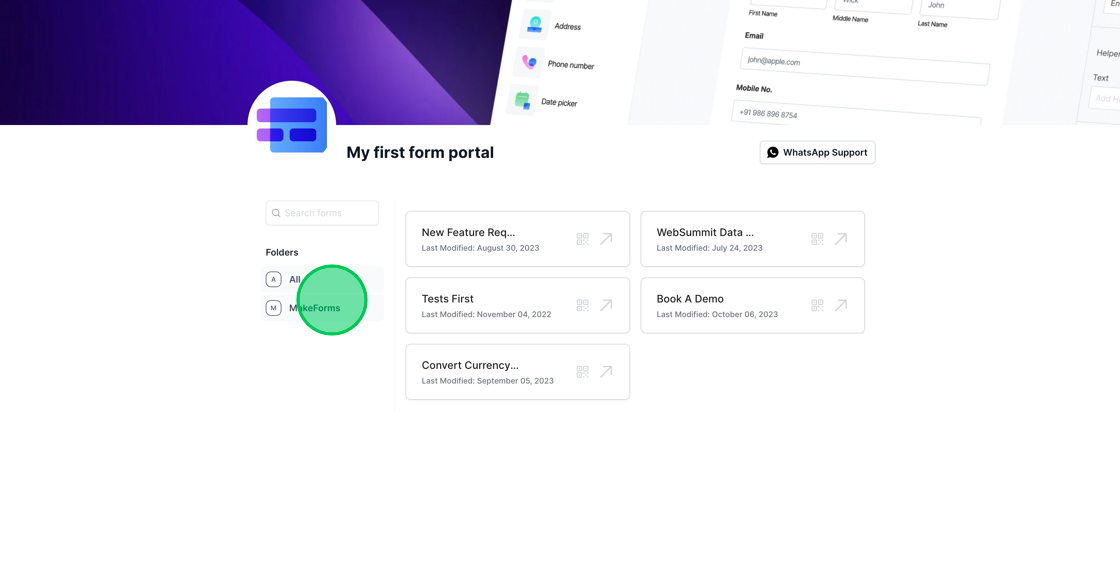
5. By default, all chosen forms appear on the Form Portal. Users have the capability to click on a specific folder to view forms contained within it, and they can also utilize the search function to find specific forms.
Managing and updating Form Portals
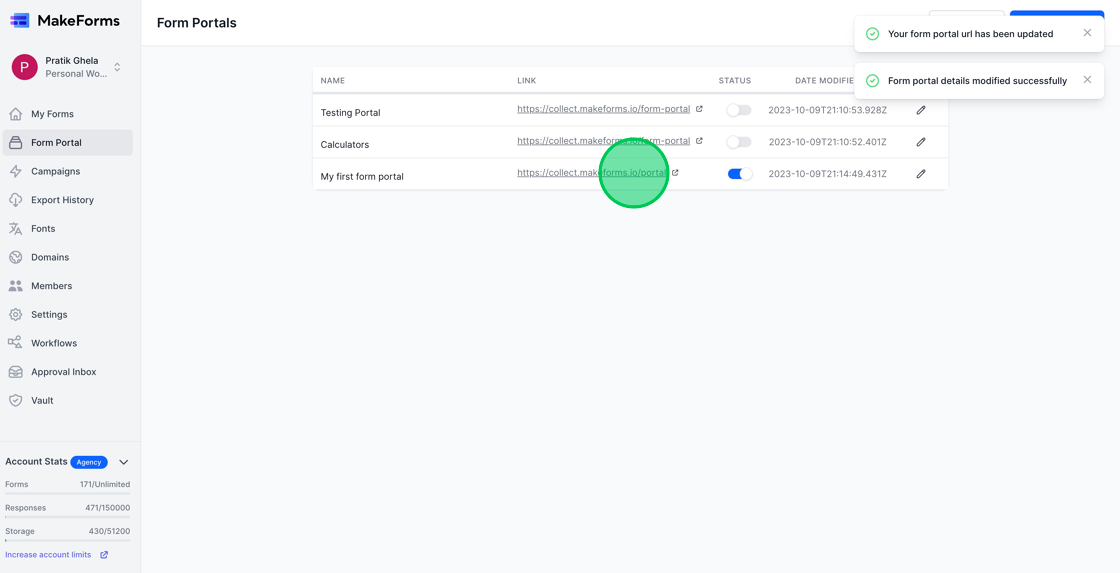
1. Should you want to temporarily deactivate a specific Form Portal, you can achieve this by toggling the switch associated with that portal.

2. To modify the Form Portal, select the “Edit” icon. This action will direct you to the Form Portal settings page.
3. To change the Form Portal URL, navigate to the Publishing details section, then click on “Update URL”. Input your new Form Portal URL and subsequently press the blue “Update URL” button.

4. The Form Portal URL has now been successfully updated and reflects the changes we just made.