Create Event Ticket Checkout Form with MakeForms
📄 Download PDF Documentation
Table of Contents
- Setting up Payment Gateway
- Creating a Form & using calculated fields to calculate the checkout amount
- Using Logic to change ticket price
- Configuring Payment Settings
Setting up Payment Gateway
1. MakeForms allows you to receive payments. To start, you must establish your Payment Gateway Connection. This connection is configured at the WorkSpace level.
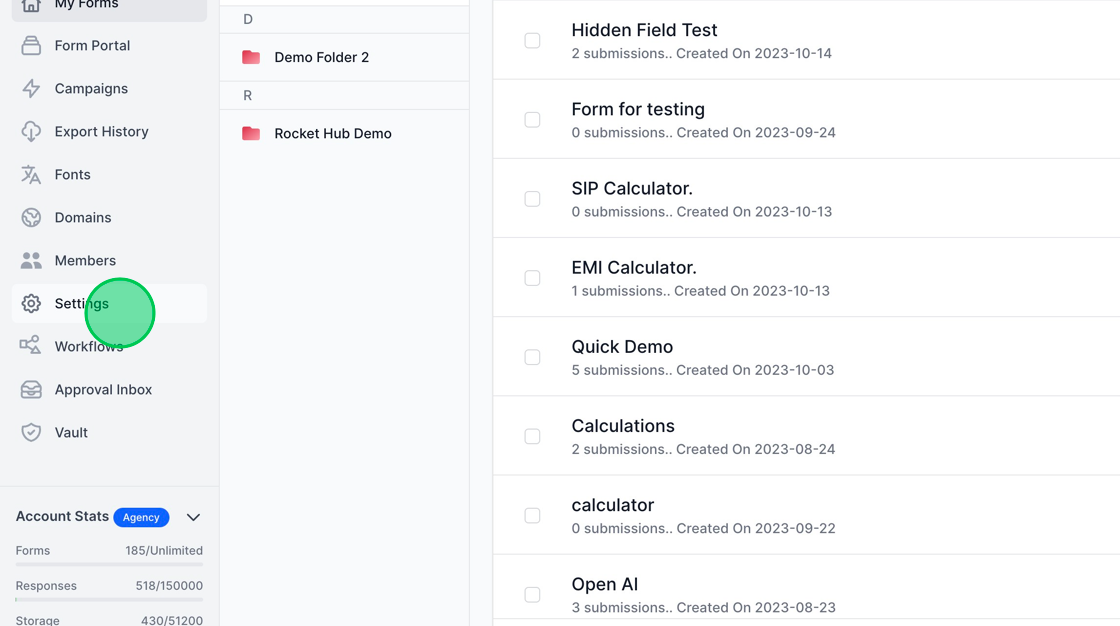
2. To configure your Payment Gateway, select the Settings option.
3. Next, navigate to the Integrations tab and click on the Payments link located at the bottom left.

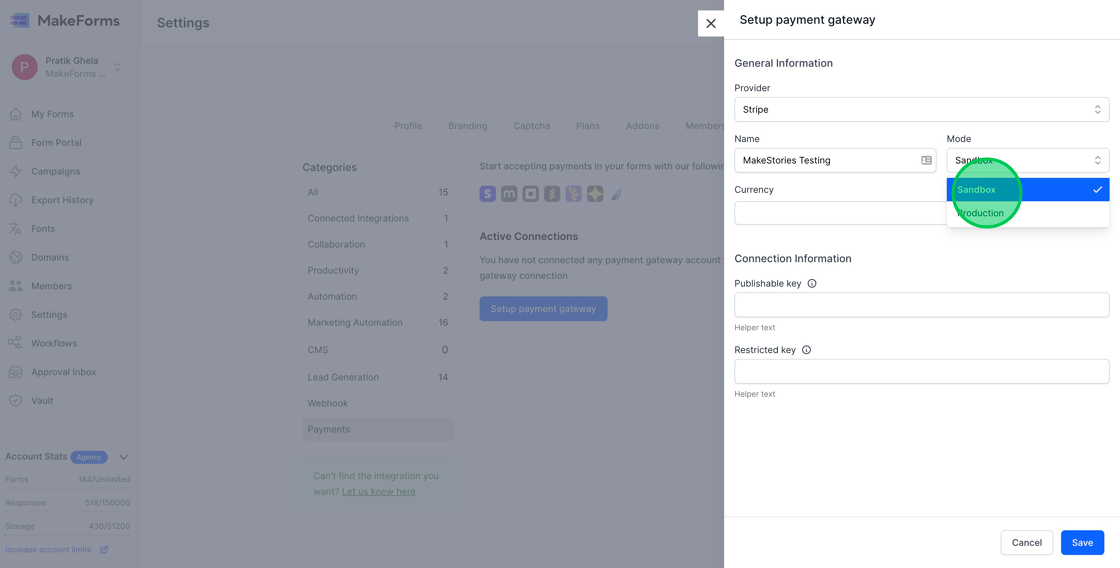
4. All your current active connections will be displayed here. To establish a new connection, click either the blue “Setup payment gateway” button or the “Add New Connection” button.

5. For our demo, we will set up Strip account. Select Stripe from the dropdown and give this connection a name.

6. Following that, you’ll need to choose the connection type. Opt for “Sandbox” if you wish to test the Payment Gateway. For real-time payments, choose the “production” option. In this demonstration, we’ll go with the Sandbox environment.
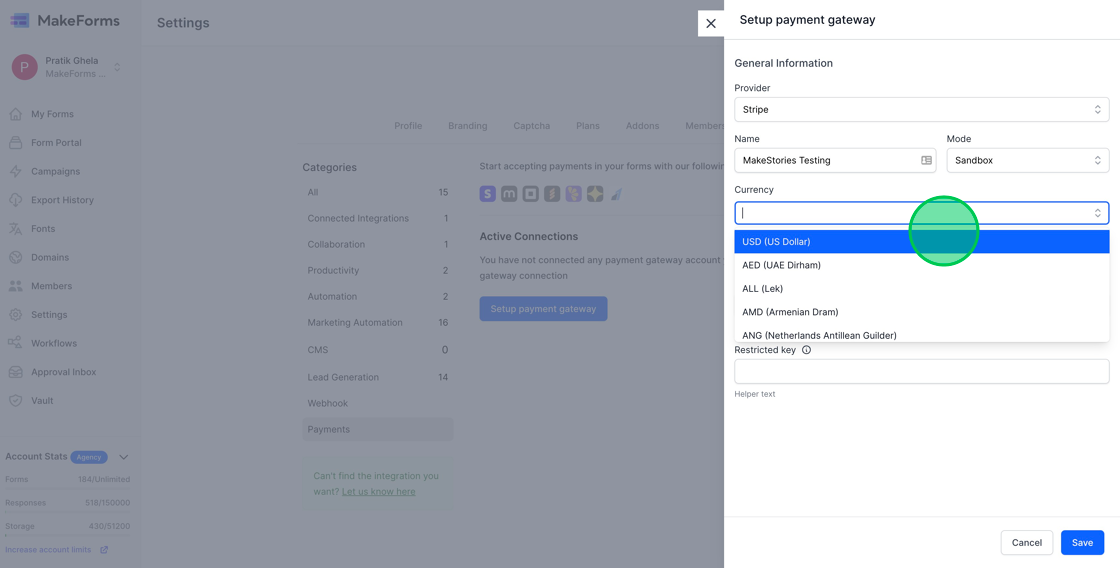
7. Up next is the choice of your default currency. For this demonstration, we’ll choose US$. Remember, you can modify the currency when configuring payments within your editor.
8. Next, input the Publishable key and Restricted Key for your Stripe Account. To understand how to retrieve these keys, please refer to the documentation at https://stripe.com/docs/keys. Once all the details are filled in, click the “Save” button.
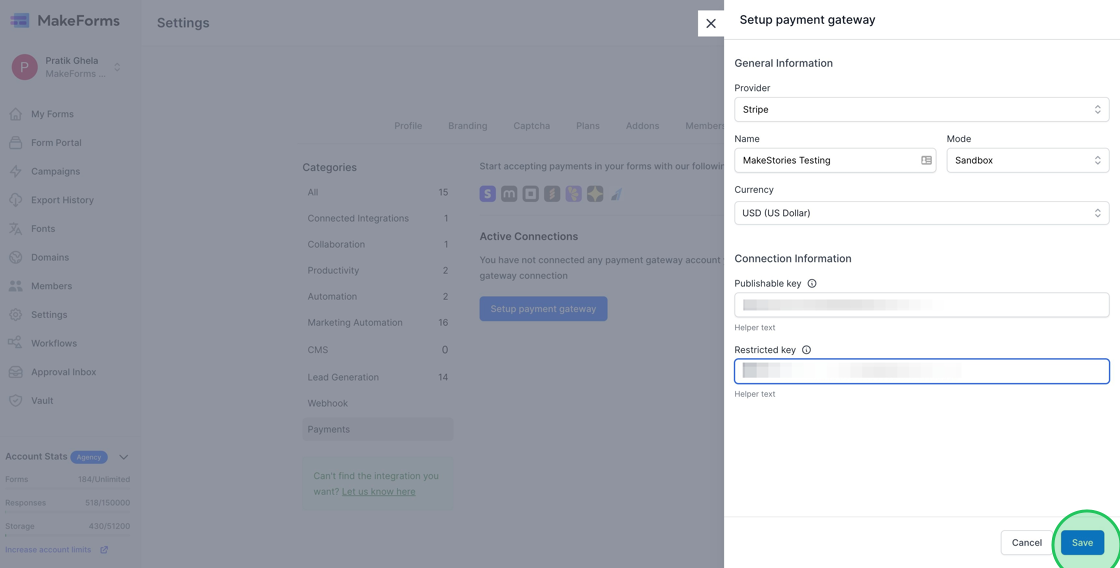
9. You should now observe that the connection has been successfully established and is displayed under the “Active Connections” section.

Creating a Form & using calculated fields to calculate the checkout amount
1. Having configured a Stripe account for our WorkSpace, we’ll now design a form to sell tickets for an event. To add some flair, we’ll integrate logic and calculated fields into our form. Here’s the plan:
- Users can choose their ticket type: VIP Pass or General Admission.
- They can then specify the quantity of tickets they’d like.
- The ticket price adjusts based on the choice: $20 for VIP and $10 for General Admission.
- As users indicate the number of tickets, the form will automatically compute the total amount due at checkout.
Begin by pressing the “Create Form” button. If you need guidance on constructing your initial form, consult the support documentation at https://makeforms.io/docs/creating-our-first-form/

2. The fields are now in place. We’ve added a radio button for ticket type selection and two numeric fields: one for indicating the Ticket Price and another for the Number of attendees.
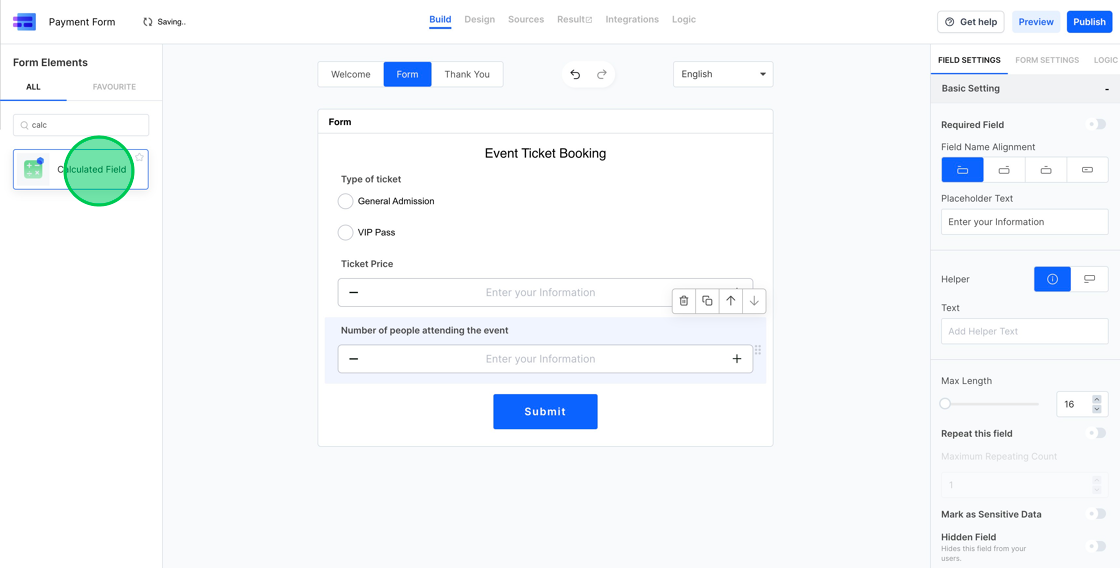
3. Next, we’ll add a calculated field and label it “Total Ticket Price.”
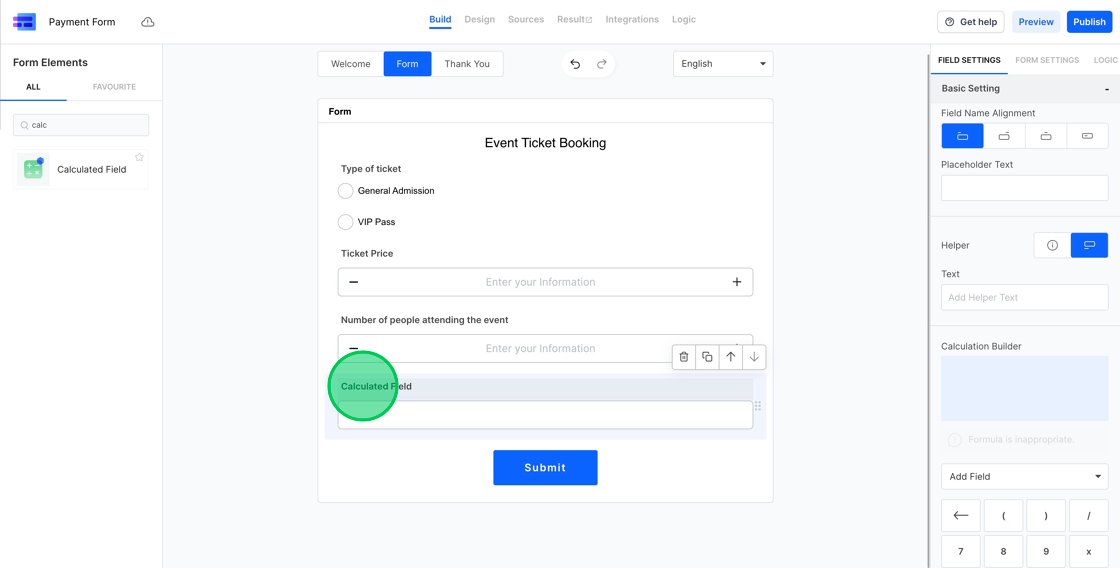
4. Within the settings for the calculated field, use the “Calculation Builder” to determine the final checkout amount by multiplying the ticket price by the number of tickets selected.

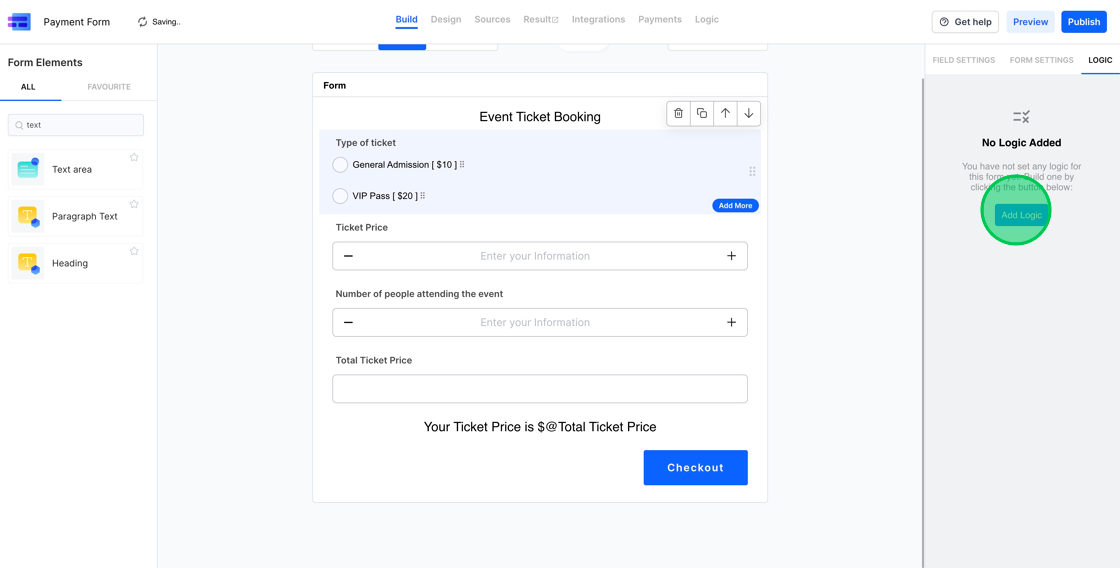
5. Lastly, we aim to showcase the Total ticket price in the format “$100,” where 100 will be substituted by the value derived from our calculated field. To do this, we’ll add a “Paragraph Text” field into our form.

6. Next, change the default Paragraph Text to “Your Ticket Price is $”. To append the dynamic value at the end, click the dropdown and select the appropriate field.

Using Logic to change ticket price
1. With the calculations in place, our subsequent task is to adjust the ticket price according to the chosen ticket type. For this purpose, we’ll utilize the “Logic” functionality in MakeForms. Access this feature by selecting the “Logic” Tab on the right sidebar. If no logic has been previously configured, you’ll spot a blue “Add Logic” button within.
2. Upon selecting “Add Logic,” you’ll be presented with the logic builder interface. While it’s possible to establish multiple logic rules within a form, our objective of setting ticket prices requires just one. The logic builder is divided into three segments: the condition segment, the ‘if matched’ segment, and the ‘if not matched’ segment. For our purpose, we’ll implement a logic such that if the “Type of Ticket” is “General Admission”, the ticket price field value becomes $10. Should this condition not be met, the ticket price will be set to $20.

3. To conclude, modify the button text from “Submit” to “Checkout” and adjust its position to be aligned to the right.

4. Prior to moving forward, it’s crucial to make certain that the “Ticket Price” field isn’t adjustable. Achieve this by selecting the “Ticket Price” field and then toggling the “Disabled field” option in the field settings.

5. To see our checkout form in action and test its functionality, simply select the “Design” Tab.

Configuring Payment Settings
1. Having completed the setup of the calculated field that determines our checkout amount, the subsequent action is to enable payments for this form. Accomplish this by selecting “Form Settings” and then toggling on the “Enable Payments” option.

2. Having established a form that adeptly calculates the total checkout amount, our next step is to configure this value for the checkout session. Achieve this by clicking the “Payments” tab.
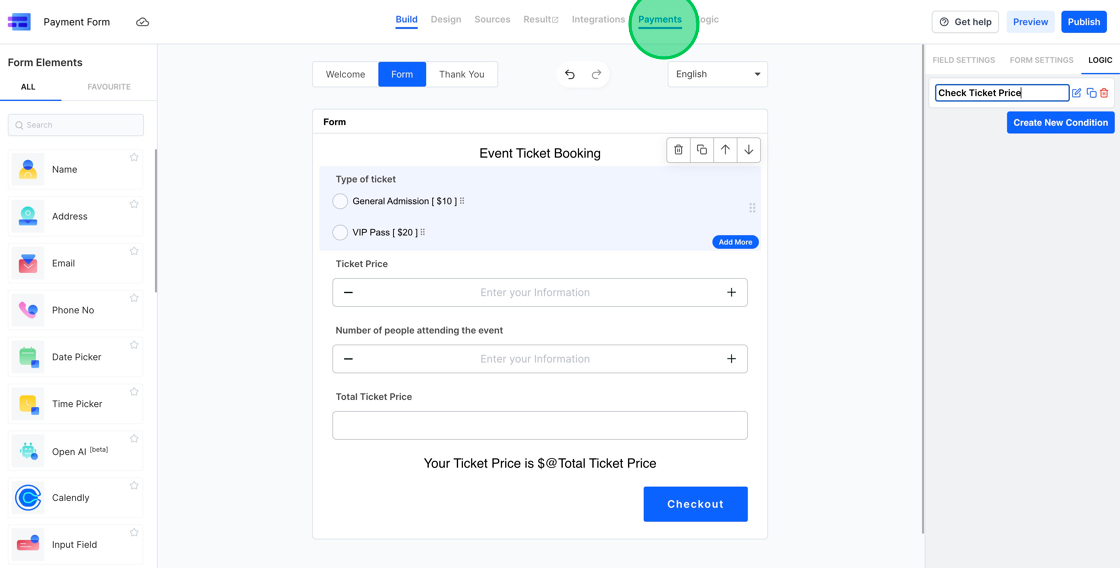
3. Upon clicking, a configuration window for payment settings will appear. First and foremost, choose the Connection. This refers to the payment connection we established at the start of this guide. For our purposes, opt for “MakeStories Testing.”

4. Upon selecting the Payment connection, the currency will automatically adjust to the default choice made during the payment connection setup. For our example, we had chosen USD, hence the Currency is pre-filled as “USD”. If you desire a change, simply click the dropdown and pick a preferred option.

5. Having configured the Payment Connection and currency, our subsequent action involves determining the checkout amount. MakeForms offers the flexibility to either opt for a fixed fee or to dynamically determine the checkout sum based on a form field’s value. Given that we’ve already arranged the logic for ticket price computation, our choice will be the latter option, labeled as “Dynamic price inserted into a field.”
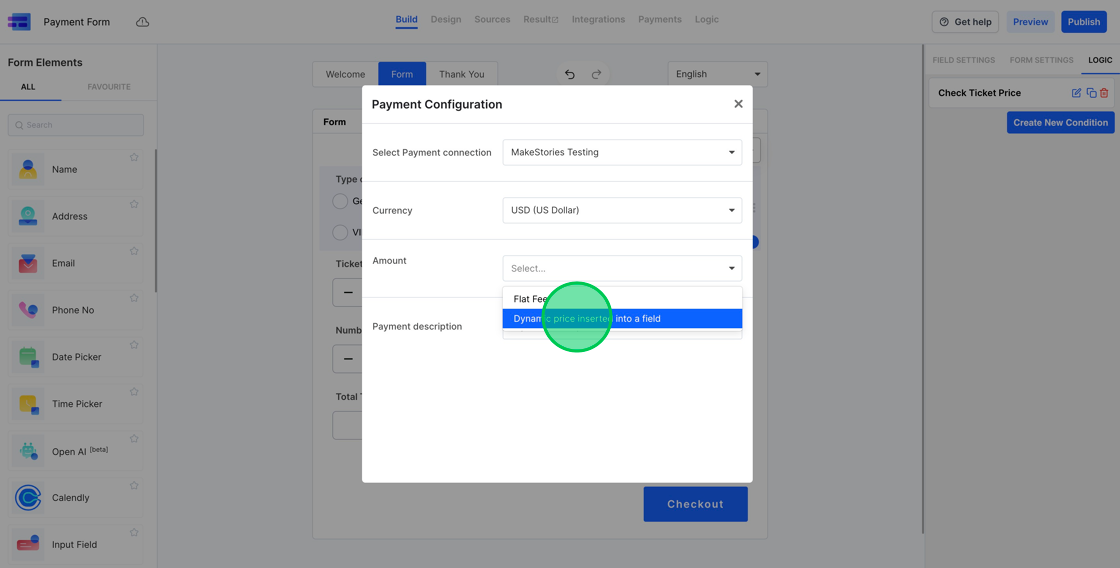
6. Upon choosing this option, a list of the form’s numeric fields will be displayed. From these, we’ll opt for the “Total Ticket Price” field.

7. To conclude, you’ll need to establish the Payment Description. This description will appear on the invoices sent by your chosen “Payment Gateway”.

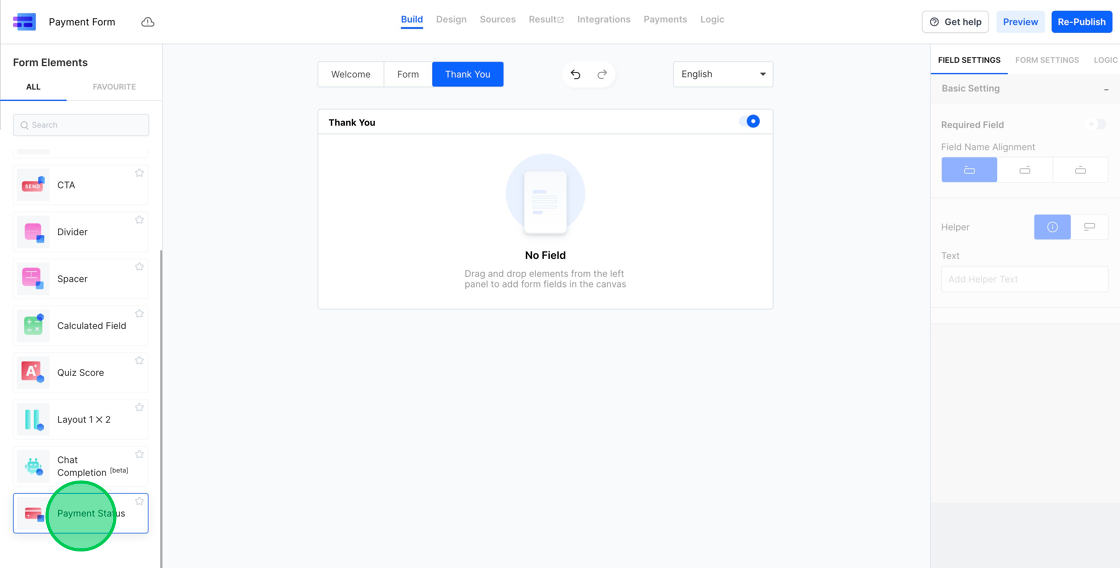
8. Having successfully set up the Payment Gateway, our next task is to configure the payment status display on the Thank You Page. For this, navigate to the “Thank You” Tab and clear out all the current elements.

9. Within the form elements, select the “Payment Status” element.
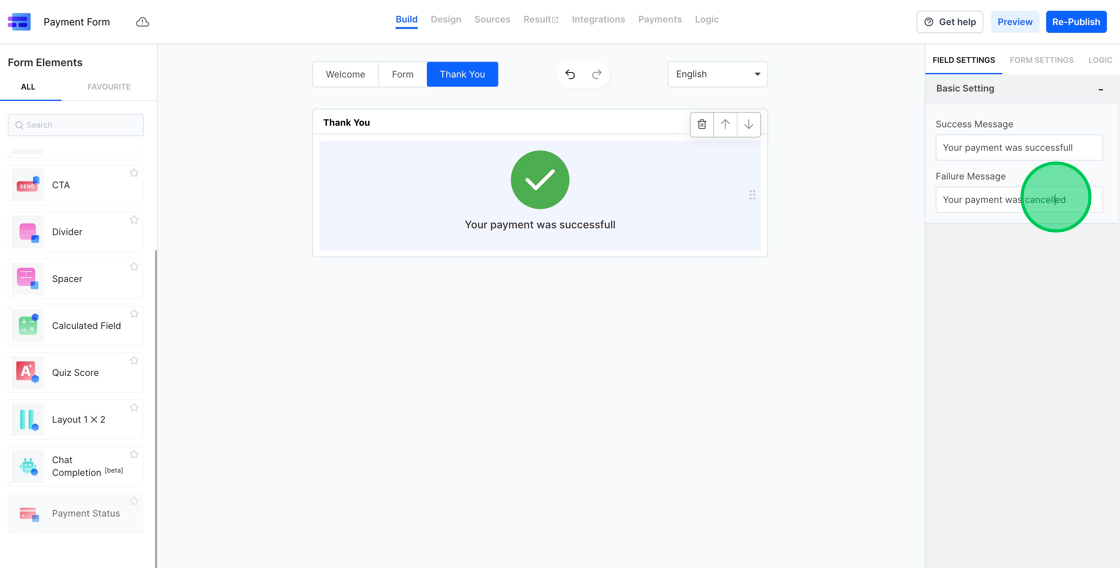
10. On the right sidebar, you have the option to modify the Payment Success and Failure Messages.
11. Now, let’s publish this form and see it in action.

You can check the sample form at https://eu.frms.link/ufeyaby/. You can test the Stripe integration by using one of the cards as per the documentation available at https://stripe.com/docs/testing