Managing Members and Access Control Lists (ACLs)

1. MakeForms facilitates collaboration by allowing you to invite your team to work together on your forms. To begin, switch to the WorkSpace where you wish to add your team member. Next, click on the “members” button located in the left menu.

Screenshot of: MakeForms facilitates collaboration by allowing you to invite your team to work together on your forms. To begin, switch to the WorkSpace where you wish to add your team member. Next, click on the "members" button located in the left menu.

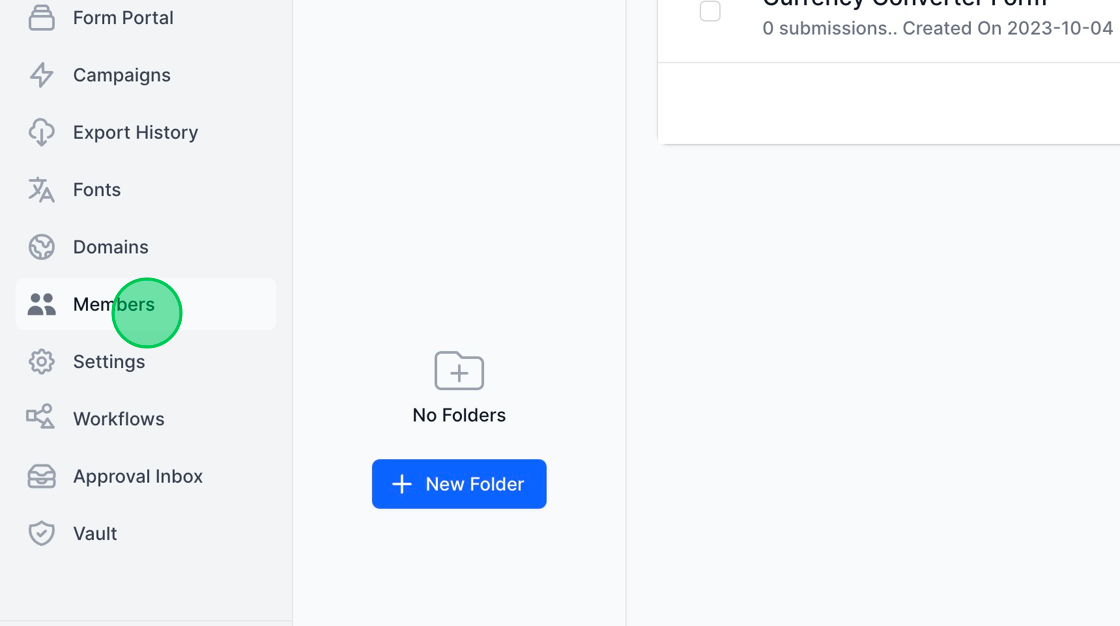
2. Upon clicking the “members” button, you will be directed to a page displaying a list of members already associated with the specified WorkSpace. If no members have been added yet, only the owner of the WorkSpace will be listed, and will be designated as the “Admin”.

Screenshot of: Upon clicking the "members" button, you will be directed to a page displaying a list of members already associated with the specified WorkSpace. If no members have been added yet, only the owner of the WorkSpace will be listed, and will be designated as the "Admin".

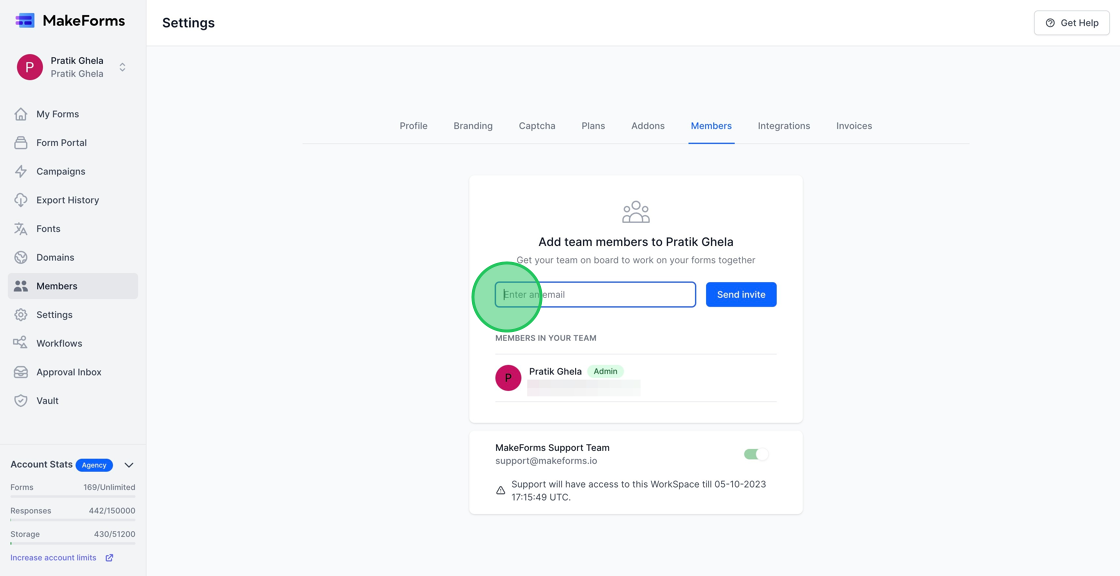
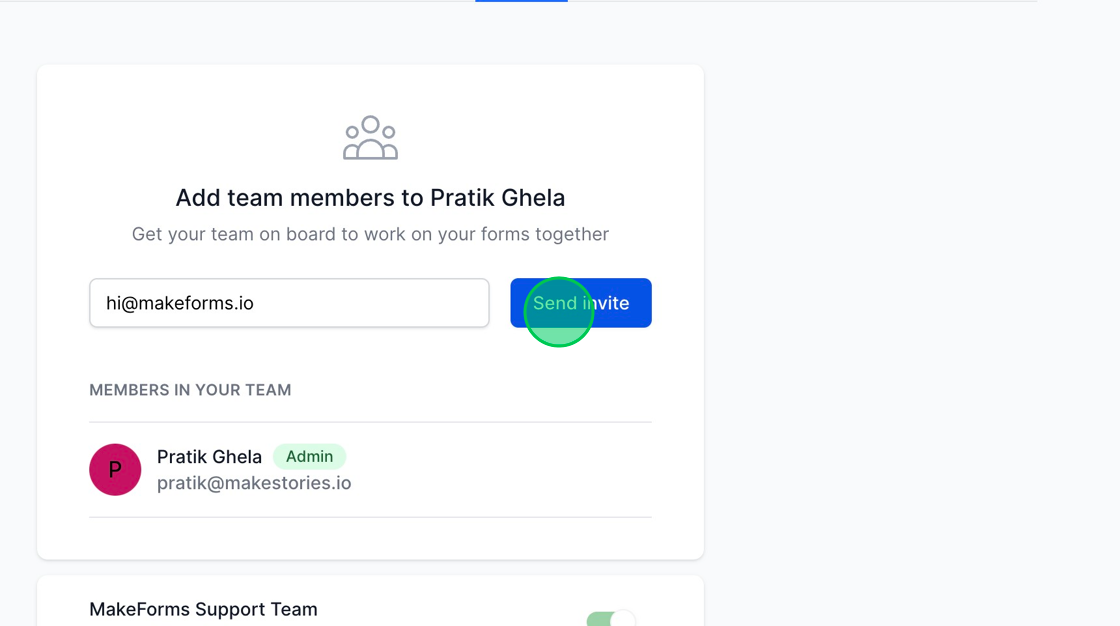
3. To add a member to the WorkSpace, simply input the email address of the individual you wish to invite into the provided field, and then click the blue “Send Invite” button.

Screenshot of: To add a member to the WorkSpace, simply input the email address of the individual you wish to invite into the provided field, and then click the blue "Send Invite" button.

4. Upon adding a member to the WorkSpace, an invitation to join will be sent to them, and the access control settings will appear. This interface allows you to meticulously define the level of access you want to grant to the user, utilizing a grid that lays out the various permissions and features available.

Screenshot of: Upon adding a member to the WorkSpace, an invitation to join will be sent to them, and the access control settings will appear. This interface allows you to meticulously define the level of access you want to grant to the user, utilizing a grid that lays out the various permissions and features available.

5. Utilizing the “Full Access” button allows you to grant comprehensive access to the user, enabling them to fully interact with and manage the WorkSpace.

Screenshot of: Utilizing the "Full Access" button allows you to grant comprehensive access to the user, enabling them to fully interact with and manage the WorkSpace.

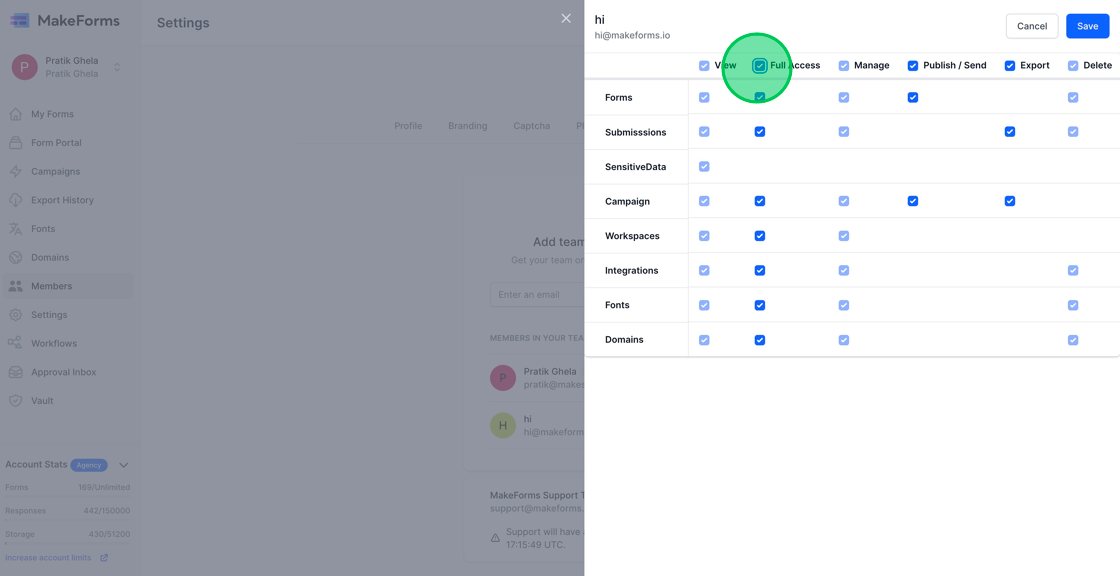
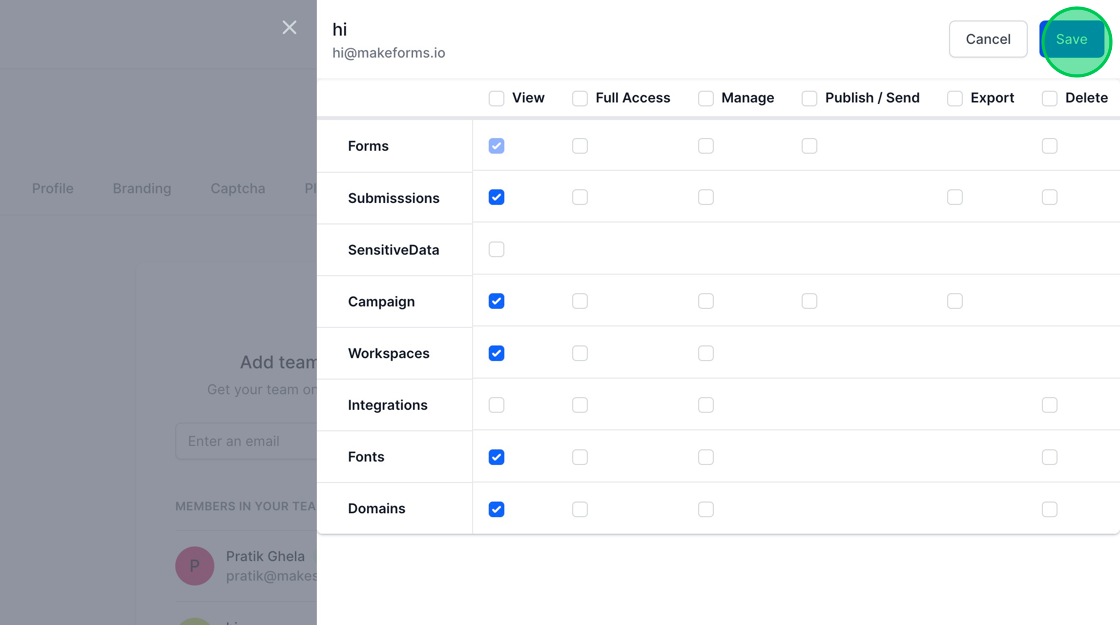
6. Alternatively, you have the option to manually select the specific access permissions you wish to grant to the user. After configuring the desired access, click the “Save” button to apply the changes. This will grant the user access to your WorkSpace accordingly. In the following section, we will explore how you can amend the access permissions assigned to a user and how to remove them from your WorkSpace.

Screenshot of: Alternatively, you have the option to manually select the specific access permissions you wish to grant to the user. After configuring the desired access, click the "Save" button to apply the changes. This will grant the user access to your WorkSpace accordingly. In the following section, we will explore how you can amend the access permissions assigned to a user and how to remove them from your WorkSpace.

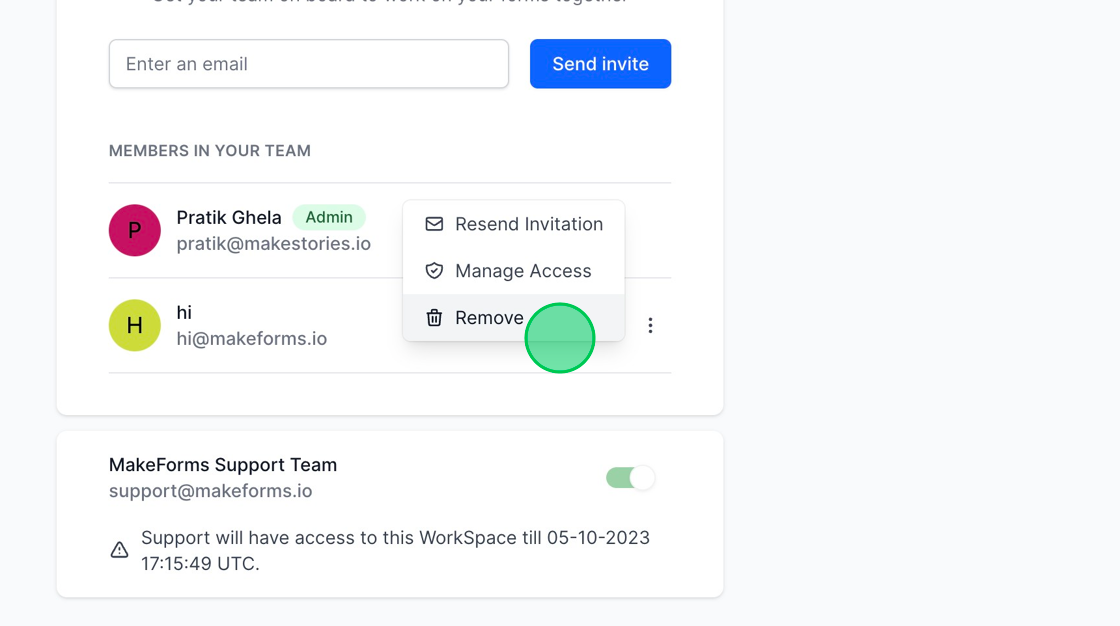
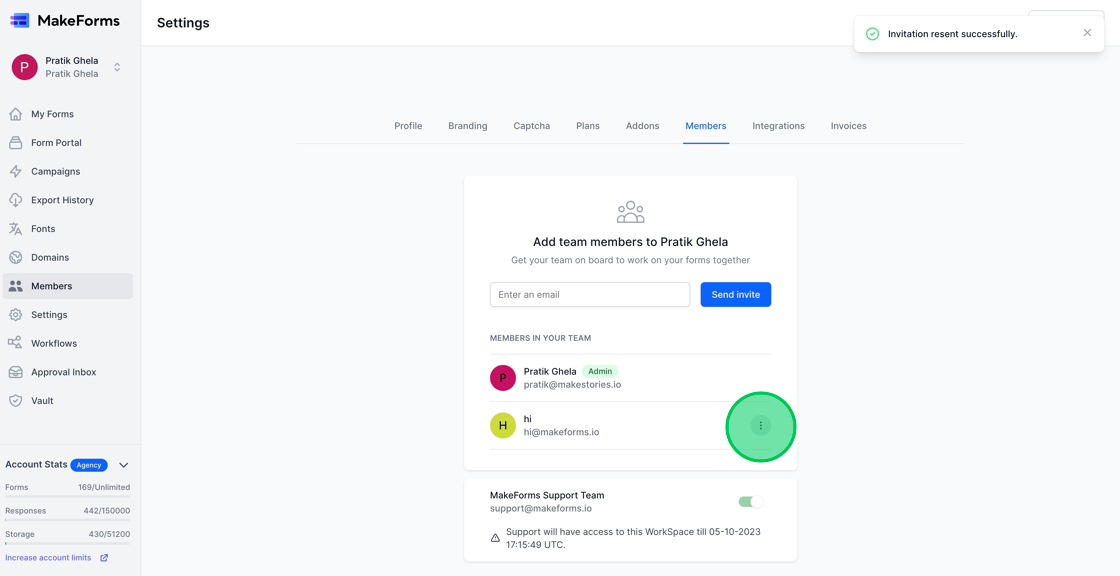
7. To manage actions for an existing user, click on the button featuring three dots, located adjacent to the user’s information.

Screenshot of: To manage actions for an existing user, click on the button featuring three dots, located adjacent to the user's information.

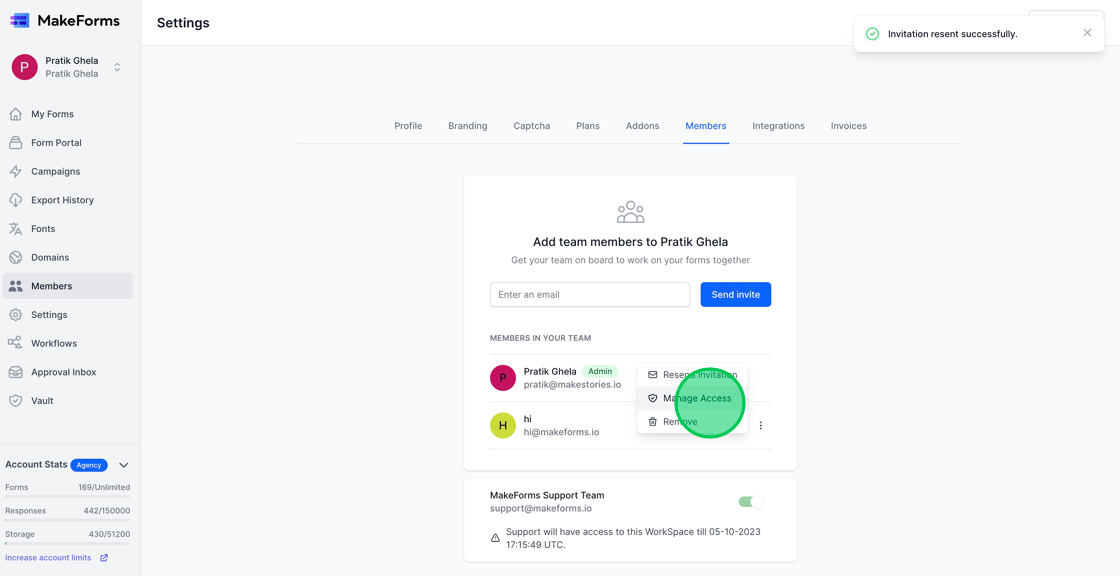
8. You have the ability to execute three actions: Resend Invitation, Manage Access, and Remove. Through these options, you can either resend an invitation to the user, adjust their access permissions, or remove them from the WorkSpace altogether.

Screenshot of: You have the ability to execute three actions: Resend Invitation, Manage Access, and Remove. Through these options, you can either resend an invitation to the user, adjust their access permissions, or remove them from the WorkSpace altogether.

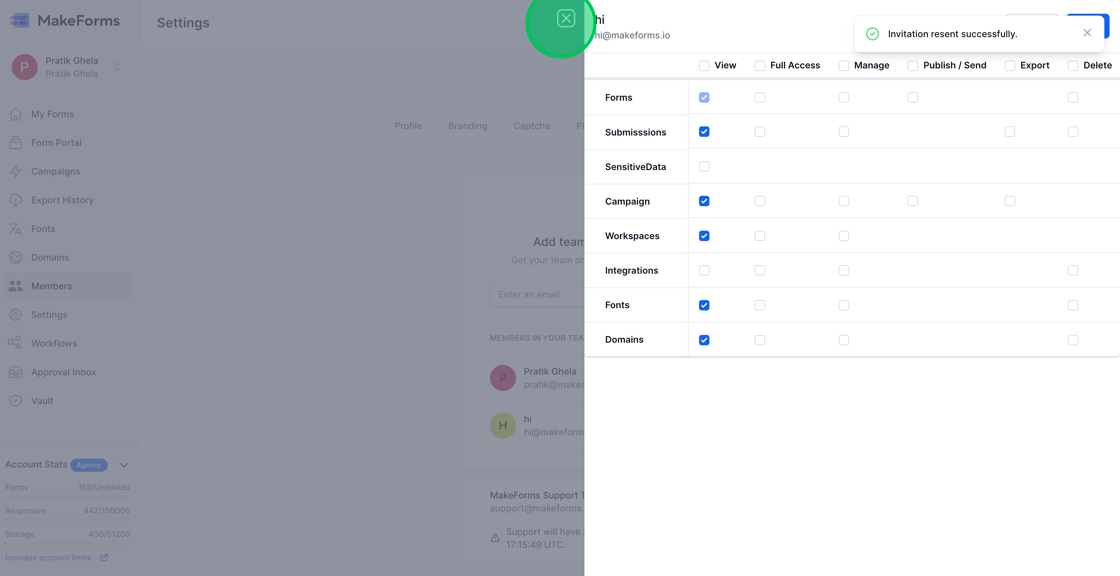
9. Clicking the “Resend Invitation” button will dispatch another invitation to the user, allowing them another opportunity to join the WorkSpace should they have missed or overlooked the initial invitation.

Screenshot of: Clicking the "Resend Invitation" button will dispatch another invitation to the user, allowing them another opportunity to join the WorkSpace should they have missed or overlooked the initial invitation.

10. To “Manage Access” and update the permissions assigned to a user, simply click on the “Manage Access” link. This will lead you to the settings where you can modify the level of access granted to the user.

Screenshot of: To "Manage Access" and update the permissions assigned to a user, simply click on the "Manage Access" link. This will lead you to the settings where you can modify the level of access granted to the user.

11. Upon clicking the “Manage Access” link, you will be presented with a list of permissions, similar to the one provided earlier. You can now adjust the access permissions for the user as needed, tailoring their level of access within the WorkSpace to your preferences.

Screenshot of: Upon clicking the "Manage Access" link, you will be presented with a list of permissions, similar to the one provided earlier. You can now adjust the access permissions for the user as needed, tailoring their level of access within the WorkSpace to your preferences.

12. Clicking the “Remove” option will expel the user from the WorkSpace, revoking their access to the forms and any associated data within that particular WorkSpace.

Screenshot of: Clicking the "Remove" option will expel the user from the WorkSpace, revoking their access to the forms and any associated data within that particular WorkSpace.