Creating Country State City Dropdown in MakeForms
Sometimes we need dropdowns to select a country, then its states, and finally, cities within that state. This means gathering data for 195 countries, tens of thousands of states, and cities.
With MakeForms, it’s a breeze. In just a few clicks, you can set up:
- A list of all countries.
- Dropdowns for Country -> States.
- Dropdowns for Country -> States -> Cities.
- Dropdowns for States -> Cities (for a specific country).
Want to set this up yourself? View our guide on creating Linked Dropdowns.
Let’s take a quick look at how MakeForms saves you hours by automating this data setup for you with predefined dropdowns.
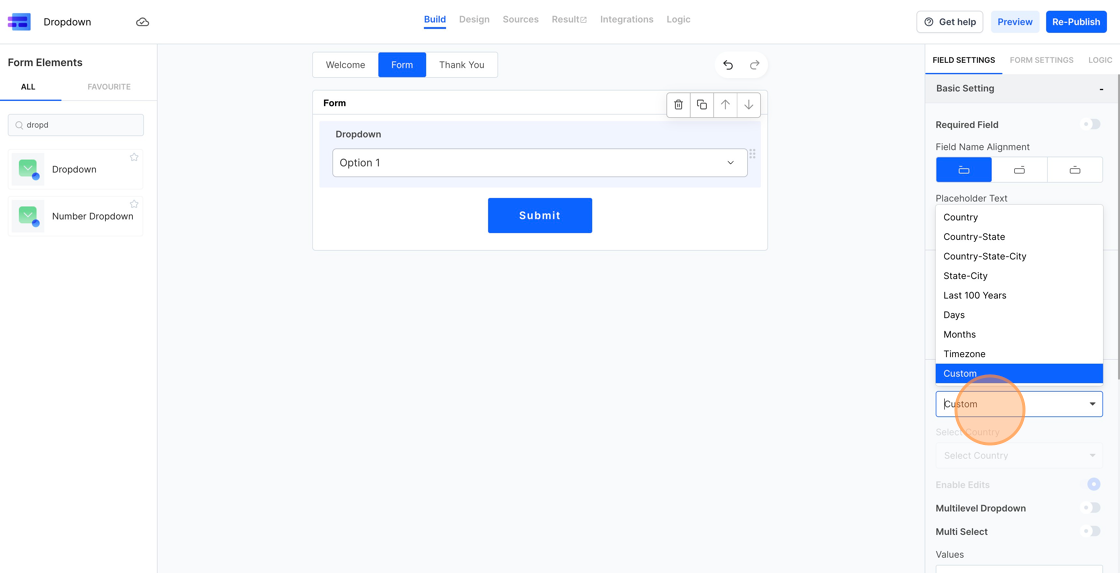
1. Begin by looking for “Dropdown” and then either click on or drag and drop the Dropdown field onto the canvas.

2. Click the Dropdown field. In the field settings, there’s an option named “Pre Defined List”. It’s set to “Custom” by default. When you click on this dropdown, you’ll notice some preset options. For this guide, we’ll focus on:
- Country
- Country – State
- Country-State-City
- State-City.
3. Choosing “Country” will show a list of all available countries.

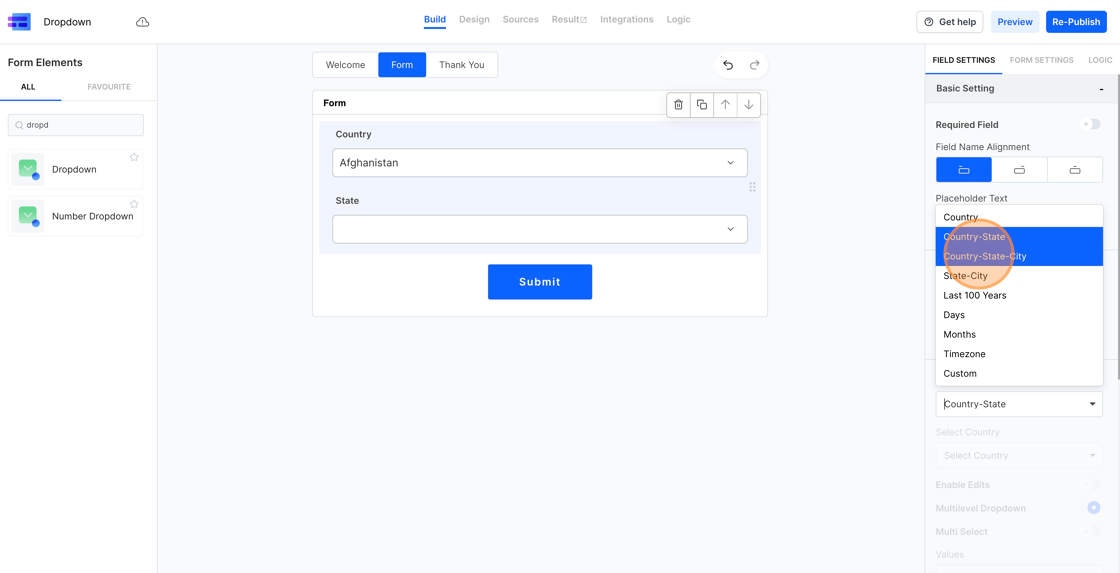
4. When you click on “Country-State”, two dropdowns will appear. The first is for countries, and the second is for states. MakeForms set these up for you automatically

5. Choosing “Country-State-City” sets up three linked dropdowns for you: one for Country, one for State, and one for City. They’re all connected, and the data is already filled in for you.
6. With the country/state/city linked dropdowns in place, let’s see them in action. Click on the Design tab for a demo. You’ll notice that when a Country is selected, the relevant states appear, and once a State is picked, the matching cities load up.

7. If you’re focusing on just one country and don’t want users to pick from country/state/city options but only from states and cities, let’s set that up. Go back to the Build tab and choose the “State-City” option.

8. Once you pick the “State-City” option, you’ll be asked to choose a “Country”. For our example, let’s go with “United States”.

9. Next, go back to the “Design” tab to see how it works. You’ll notice two dropdowns: one for states and another for cities, both tailored to the United States.
The demo form is available at https://eu.frms.link/nyyjnmg/
